If you’ve been scrolling through home design blogs or watching off-grid living videos, chances are you’ve seen container barndominium plans as the top recommendations.
Today, container barndominiums are fast becoming a top choice for those who want to build a unique home without spending a fortune.
In this article, we’ll explore why these hybrids are gaining popularity, explore design ideas, and walk you through how to build one step by step.
No matter the reason for your visit, this guide contains everything you need to start dreaming – and building – your humble abode.
Also Read: Shipping Container Deck: Perfect Addition for Container Homes
Why Shipping Container Barndominiums?
Let’s start with why people are falling in love with shipping container barndominiums:
Affordability
Shipping containers are a cost-effective building material. Depending on size and condition, a used container can cost $2,000 to $5,000.
Even with customization, building with containers is often cheaper than traditional stick-built homes or prefab barndominiums.
Plus, since you’re working with a pre-fabricated metal shell, you cut down on framing costs and time and enjoy a quicker and cheaper construction process.
Strength and Durability
Containers’ corten steel construction makes them naturally resistant to pests, moisture, and fire.
When anchored and sealed correctly, they’re tough enough to withstand extreme weather patterns like hurricanes and heavy snow loads.
They’re also low maintenance. Unlike wood-framed structures, containers don’t rot, warp, or suffer termite damage.
Once you seal the roof and cut edges correctly, you’re set for decades.
Fast Construction
Since shipping containers are already a pre-built structure, they dramatically reduce construction time.
You can complete a basic container barndominium in a few months instead of a year or more for building conventional homes.
Some ambitious DIYers have even built their entire container barndominiums in under six months, which explains their appeal.
Modular Design
Shipping containers are stackable and easy to combine, which makes them incredibly flexible.
Want an open-concept living room? Just connect two 40-foot containers and open the wall.
Want a second story? Stack another container on top. The modular approach makes space planning a breeze.
With thoughtful placement and minimal interior walls, you can create a barndominium layout that suits your lifestyle.
Sustainability
Repurposing used containers keeps them out of landfills and reduces your carbon footprint.
You can also add sustainable features like solar panels, rainwater harvesting, and energy-efficient insulation to make the home even more eco-friendly.
If you wish, combine reused materials with an efficient design, and you’ll have a green home that performs well without draining resources.
Shipping Container Barndominium Idea Recommendations
Explore our container barndominium plans and ideas you can check as recommendations or references for your future home!
The Classic 2-Container Home
This layout uses two 40-foot containers placed side-by-side, giving you about 640 square feet of living space.
Add a vaulted roof over the middle for extra headroom and natural light. It’s simple, cost-effective, and ideal for singles or couples.
The L-Shaped Layout
Want a bit more privacy? Choose this barndominium idea!
The L-shaped plan uses two or three containers in an angled arrangement, perfect for separating the bedroom wing from the living/kitchen space.
The 3-Container Barndo with Loft
Stack two containers side by side and place the third one on top as a loft. Use the upper level for a bedroom or office.
This design maximizes vertical space and gives off a cool industrial-meets-modern-farmhouse vibe.
The Open Courtyard Plan
Here’s a fun one – create a U-shaped structure using three or four containers and leave the middle open for a private courtyard or garden.
You’ll enjoy indoor-outdoor living with tons of natural airflow and light.
The 4-Container Ranch Layout
For more square footage, place four containers in a square or rectangle. Remove sections of the interior walls to create one large open-concept living space.
This plan is great for families or anyone craving elbow room.
The “Garage & Loft” Combo
Combine a container garage with a living space above or beside it. This plan is ideal if you need a place for tools, vehicles, or a workshop. Use a stairwell or ladder to access the loft living quarters.
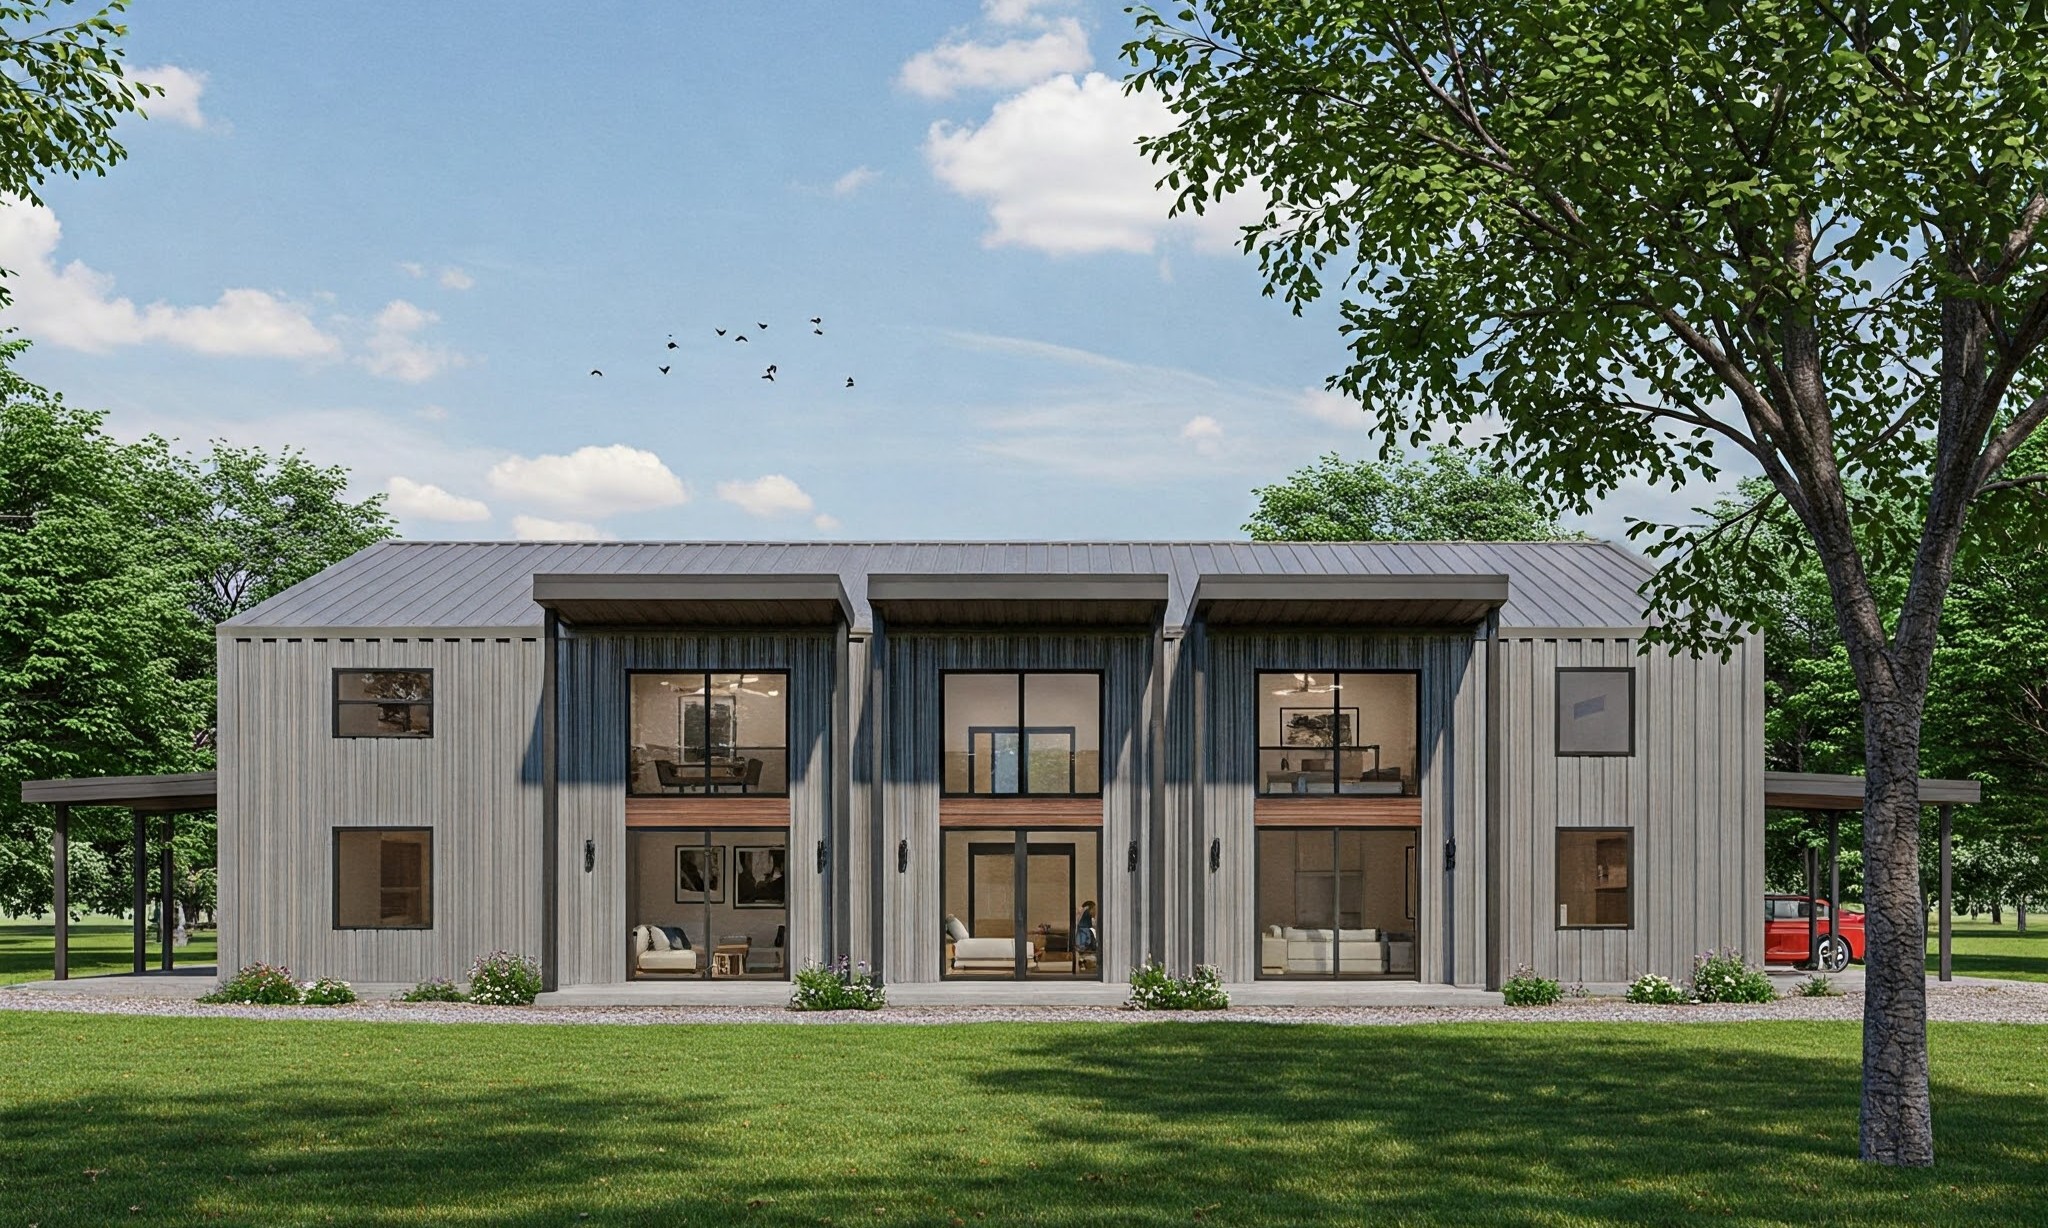
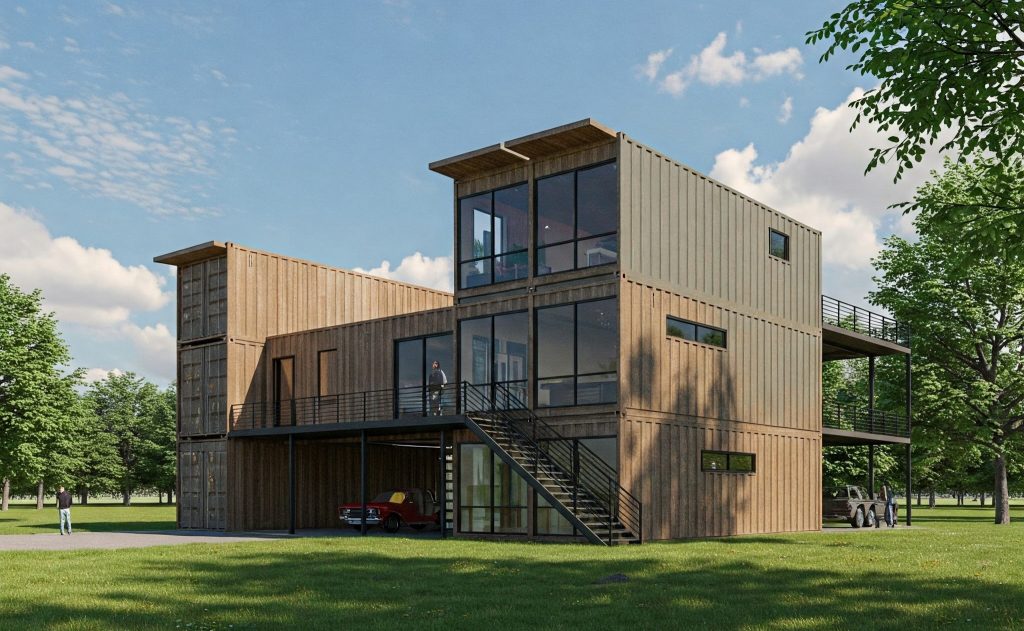
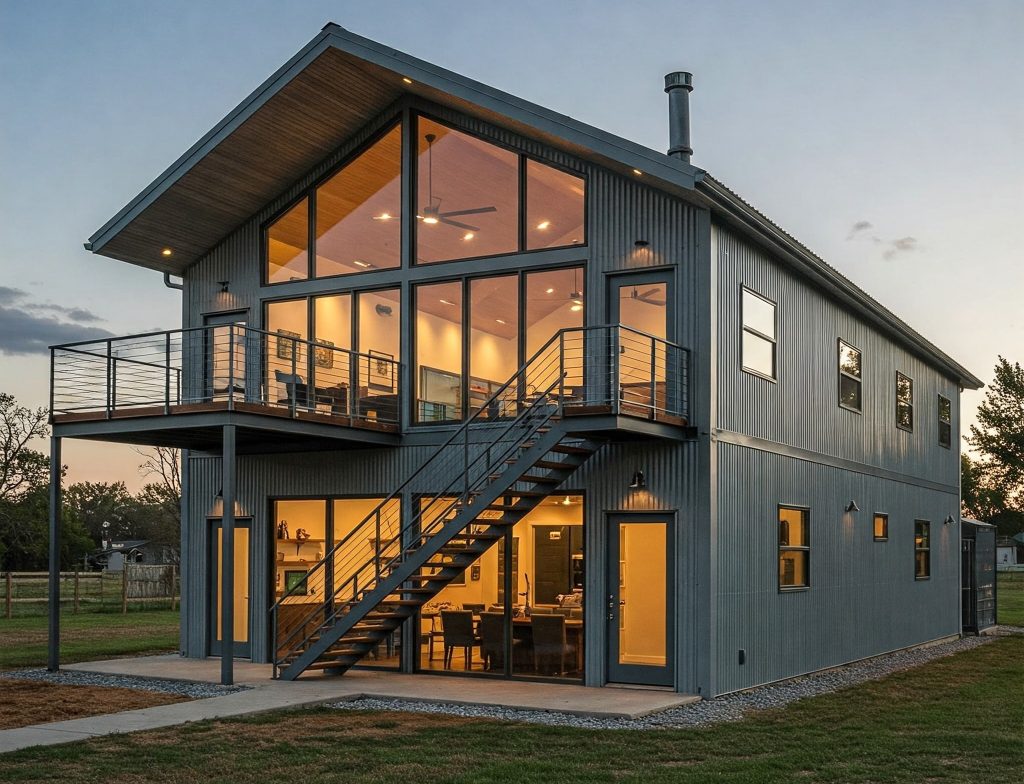
The Multi-Level Modern Farmhouse
Stack containers two or even three levels high to create a multistory container barndominium.
Use large windows, a steel staircase, and open floor plans to keep the interior airy and bright. This one’s a showstopper.
The Container + Barn Hybrid
In this plan, containers serve as the sidewalls of your structure, while a large steel or wood barn-style roof spans across them.
The gap between the containers becomes your living area, protected by the barn roof. It’s the best of both industrial and country charms.
The Tiny Container Barndo
Downsizing? Use a single 20-foot or 40-foot container to build a minimalist barndominium. Add a rooftop deck or side patio to expand your living area.
This is a budget-friendly and eco-conscious option for solo living or vacation rentals.
The Container Family Home
Use six or more containers to build a spacious barndominium with 3–4 bedrooms, multiple bathrooms, a large kitchen, and a family room.
Arrange them in rows or layers, and don’t forget to add custom finishes that reflect your style.
Guide to Building Shipping Container Barndominiums
Ready to build? Here’s a step-by-step breakdown of what to expect, from preparation to finishing touches.
What to Prepare
Before you start cutting and welding, get everything lined up.
Site Selection
Pick a piece of land with proper zoning, access to utilities, and solid ground for foundation work.
Rural areas are popular for barndominiums but double-check building codes. Also consider sun orientation, views, drainage, and local weather patterns.
Container Sourcing
Find reputable suppliers that offer containers in good condition. Decide whether you want new (“one-trip”) or used containers.
Be sure to inspect them for rust, dents, or chemical contamination. If you’re stacking containers, make sure they’re structurally sound.
Design Plans
Either hire an architect familiar with container homes or use pre-made plans. Make sure your layout includes structural reinforcements, plumbing, and electrical plans.
Some states may require engineered drawings, so work with professionals who understand local regulations.
Permits and Regulations
Every area has different building codes, so collect permits for construction, plumbing, electrical, and septic (if off-grid).
It’s crucial to work with local inspectors or contractors familiar with container builds. Permitting can take weeks or even months, so start early.
Cost Calculations
Shipping container barndominiums can vary widely in cost depending on design complexity, materials, and labor.
| Item | Estimated Cost |
|---|---|
| Shipping Containers (2–4 units) | $8,000–$20,000 |
| Site Preparation & Foundation | $5,000–$15,000 |
| Structural Reinforcement | $3,000–$8,000 |
| Interior Build-Out (walls, flooring, insulation) | $30,000–$60,000 |
| Plumbing & Electrical | $10,000–$20,000 |
| Roof Installation (gable or custom) | $10,000–$25,000 |
| Windows & Doors | $5,000–$15,000 |
| Finishes & Fixtures | $10,000–$30,000 |
Want to go ultra-budget? A tiny container barndominium could cost as little as $50,000 if you keep it simple and DIY most of the labor.
Steps to Build Shipping Container Barndominiums

Building a shipping container barndominium might sound like a bold project – but with the right plan and a bit of grit, it’s doable.
Choose and Prepare Your Land
Before anything else, scout a piece of land that suits your vision. Look for flat terrain with good drainage and easy access to utilities.
Once you’ve secured the property, clear any trees or debris, level the ground, and get your site ready for foundation work.
Planning to go off-grid? Factor in water, power, and waste systems early.
Design Your Layout
Next, sketch out your container layout. Will you use two 40-foot containers side-by-side? Maybe four in an L-shape?
Decide how many containers you’ll need and where each room will go. Consider things like window placement, open spaces, and flow between rooms.
You can hire an architect or use pre-designed barndominium plans built specifically for containers.
Secure Permits and Approvals
Before you break ground, contact your local building department. Each city and county has different rules when it comes to alternative builds.
Submit your floor plans, engineering reports, and site drawings for approval. It might take a few weeks, so don’t skip this step – it’ll save you major headaches later.
Pour the Foundation
Once you’ve got the green light, it’s time to pour your foundation since most container barndominiums sit on concrete slabs or pier foundations.
Make sure your base is level and reinforced. Containers are heavy, and once they’re in place, you don’t want any shifting.
Place the Containers
Now comes the fun part! Place the containers using a crane or heavy-duty equipment to move them onto your foundation.
Line them up according to your plan, then weld or bolt them down to keep everything secure. Once they’re in place, double-check measurements before making any cuts.
Cut Openings and Reinforce
Cut out spaces for doors, windows, and any interior walls you plan to remove. But here’s the catch: when you cut into a container, you weaken its structure.
So, reinforce those areas with steel beams or frames to maintain the home’s integrity. Safety first!
Frame the Interior
Start framing out the inside using wood or steel studs and create walls for bedrooms, bathrooms, and other rooms.
This step sets the stage for insulation, electrical wiring, and drywall installation.
Think about the final layout as you frame, as this is your last chance to tweak room sizes before everything gets sealed up.
Insulate and Run Utilities
Shipping containers aren’t naturally well-insulated, so you’ll need to add materials like spray foam, rigid foam boards, or mineral wool.
At the same time, install plumbing, electrical wiring, and HVAC systems. Bring in licensed professionals to ensure everything is up to code.
Finish the Exterior and Roof
Choose gabled or metal roofing to get that classic barndominium look and keep your barndominium safe from rain and anything else.
You can also wrap your container home in wood, metal siding, or stucco to improve curb appeal and insulation.
Also, don’t forget to seal all seams and openings to keep out moisture and pests.
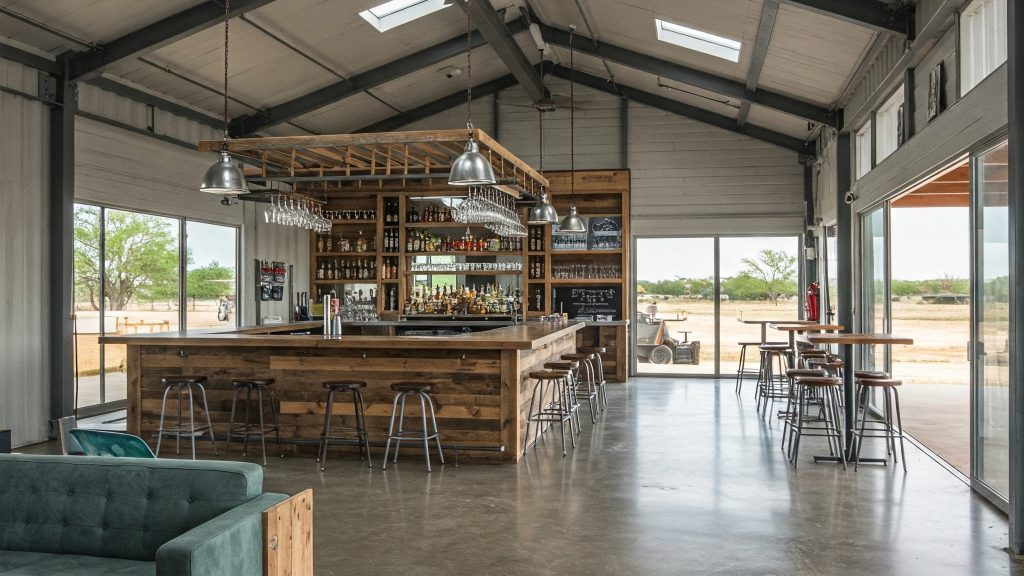
Complete the Interior
Finally, hang drywall or paneling, install flooring, and bring in cabinets, fixtures, and paint.
Add personal touches like lighting, appliances, and furniture. Once everything’s in place, schedule final inspections and prepare to move in.
Additional Tips

Here are a few expert insights to help your project go smoother:
Plan for Airflow and Light
Containers can feel dark and boxy, so add large windows, skylights, and glass doors to make the space feel open and bright.
Don’t Skip Reinforcements
Any time you cut into a container wall, you’re compromising its structural integrity, so reinforce those cuts with steel frames to keep your home safe and stable.
Use a Vapor Barrier
Metal containers can build up condensation, especially in cold climates. Install a proper vapor barrier along with insulation to prevent moisture problems down the road.
Also Read: Tips on Improving the Security of Your Shipping Container Garage
Conclusion
By following the guide above to materialize your preferred container barndominium plans, having your dream barndominium is only a few steps away. To source the best shipping containers for the construction plan, find them from Tradecorp today! Built to last decades and convertible to nearly any building type, Tradecorp always delivers whenever clients need their container solutions.